

There are many tools and frameworks that support programmers to develop applications with serverless architecture. Serverless framework and Sigma are a couple of those tools that make developing serverless applications easier. In this article, we will be showing how to create a simple project with a rest API endpoint with API Gateway and DynamoDB using Serverless framework and a little comparison between Serverless framework and Sigma in creating a project.
Serverless init
The serverless framework provides a template in default with handler.js file, serverless.yml file. You just need to run the command from where you want to develop the project
serverless create –template aws-nodejs –name
1
	sls deploy
As you now have a deployed serverless project with a lambda function. You can invoke this function with
1
	sls invoke --function <function_name>
And you should get a successful response with 200 status code and body.
Adding API Gateway
API gateway is an event for a lambda function, these events should be declared in the serverless.yml file under functions. For every function to be invoked there should an event. Making changes in the yml file may be a little bit messy. Even a wrong indent will cause a fail deployment.
As we have created the project with serverless template there will be several commented events. As API gateway is an HTTP event I comment out HTTP event in the serverless.yml file and declare its path as “/” and method as “ANY” and deploy the project.
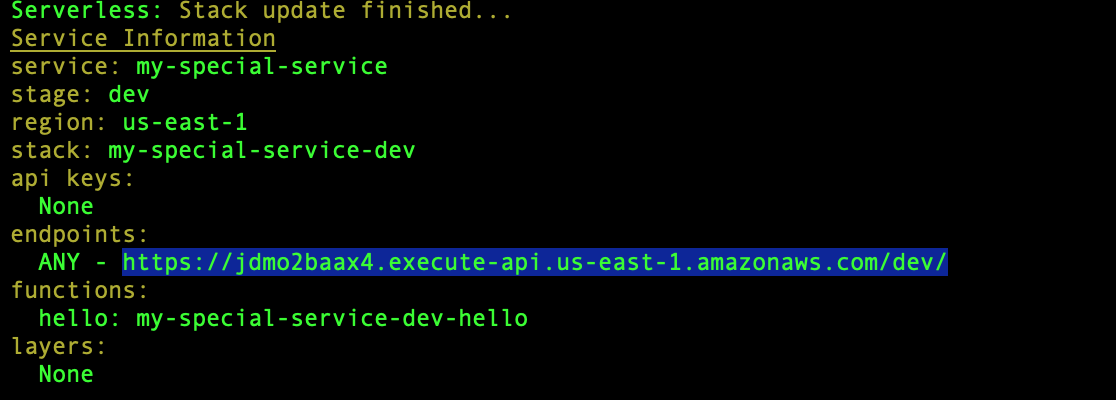
After a successful deployment, you will be given an endpoint URL for the deployed API Gateway
As I will be adding two more lambda functions to the project as addUser and getUser, events for these functions also will be declared in yml file under a different path “user”. Finally, the functions section of your serverless.yml file will look like following. After deployment, you will get three endpoints
1
2
3
4
5
6
7
8
9
10
11
12
13
14
15
16
17
18
19
functions:
  hello:
    handler: handler.hello
    events:
     - http:
          path: /
          method: ANY
  addUser:
    handler: handler.addUser
    events:
      - http:
          path: user
          method: POST
  getUser:
    handler: handler.getUser
    events:
      - http:
          path: /user
          method: GET
Creating more lambdas
You can write above mentioned two lambdas in two separate files, or you can write all those functions in a single file. I’m going to update the handler.js file including above 2 lambdas. I am going to copy and paste the lambda function change its function name to “addUser”, and “getUser”. Change the message to “Adding user” and “Getting user” of addUser and getUser lambda functions respectively. The code will look like below.
1
2
3
4
5
6
7
8
9
10
11
12
13
14
15
16
17
18
19
20
21
22
23
24
25
26
27
28
29
30
module.exports.hello = (event, context, callback) => {
        const response = {
          statusCode: 200,
          body: "Hello!!!!"
        };

        callback(null, response);
        return
    };

    module.exports.addUser = (event, context, callback) => {
        const response = {
            statusCode: 200,
            body: "Hello!!!!"
        };

        callback(null, response);
        return
    };

    module.exports.getUser = (event, context, callback) => {
        const response = {
            statusCode: 200,
            body: "Hello!!!!"
        };

        callback(null, response);
        return

    };
By deploying the project again new lambda functions will be deployed in the cloud and you could check those lambdas by invoking the endpoints.
Adding DynamoDB
1
2
3
4
5
6
7
8
9
10
11
12
13
14
15
16
17
resources:
  Resources:
    UsersDynamoDBTable:
      Type: 'AWS::DynamoDB::Table'
      Properties:
        AttributeDefinitions:
          -
            AttributeName: userId
            AttributeType: S
        KeySchema:
          -
            AttributeName: userId
            KeyType: HASH
        ProvisionedThroughput:
          ReadCapacityUnits: 1
          WriteCapacityUnits: 1
        TableName: ${self:custom.tableName}
In here we are going to add DynamoDB as a resource. Which means we have to update the serverless.yml file again. You can declare the dynamoDB with the properties as below in the serverless.yml with required permissions for operations needed to be done with dynamoDB.
And you have to update the lambda functions of addUser and getUser by adding PUT operation and GET operation of DynamoDB respectively. Your code should look like below
1
2
3
4
5
6
7
8
9
10
11
12
13
14
15
16
17
18
19
20
21
22
23
24
25
26
27
28
29
30
31
32
33
34
35
36
37
38
39
40
41
42
43
44
45
46
47
48
49
50
51
52
53
54
55
56
module.exports.addUser = (event, context, callback) => {
	const data = JSON.parse(event.body);


	const params = {
	    TableName: USERS_TABLE,
	    Item: {
	      userId: data.userId,
	      name: data.name,
	    },
	  };


	dynamoDb.put(params, (error, result) => {
    // handle potential errors
    if (error) {
      console.error(error);
      callback(new Error('Couldn\'t add user.'));
      return
    }

    // create a response
    const response = {
      statusCode: 200,
      body: JSON.stringify(result.Item)
    };
    callback(null, response);
    return
  })
};

module.exports.getUser = (event, context, callback) => {

	console.log(event.queryStringParameters.userId);

	const params = {
	    TableName: USERS_TABLE,
	    Key: {
	      userId: event.queryStringParameters.userId,
	    },
	  };
	dynamoDb.get(params, (error, result) => {
		if (error) {
			callback(new Error("Coudn't get user"), null);
			return
		}

		const response = {
			statusCode: 200,
			body: JSON.stringify(result.Item)
		};
		callback(null, response);
		return
	})
};
After deploying the functions you can call for the endpoints and perform add a user, get user operations. One other important thing is in the developing with the serverless framework is whenever you made a change in the code does not need to perform a full deployment where it updates lambda functions and as well as the cloud-formation stack. You can just deploy the function that you have made changes with the following terminal command
1
sls deploy -f <function_name>
So now you have a fully functioning serverless rest APIs to perform multiple operations. But is this the simplest way to create a project with serverless architecture. Isn’t there any easy way of creating resources and managing them without dealing with a yml file. Do I have to refer documents for every time I use AWS services searching for keywords? So many questions might be going through your mind right now. Answers to the above questions are no, yes, and no. The simplest answer to all the above questions is Sigma.
Sigma is a serverless application developer tool; a cloud IDE, which helps you rapidly build, test and deploy serverless applications. There is no need to struggle with yml files in creating resources, events, assigning permissions or reading AWS docs for searching keywords and methods for different services. All of this comes to you with just a drag and drop. Following clip shows you, how easily you can add triggers and resource to your project.
Managing resources isn’t the only advantage of sigma over Serverless framework, there are a lot more which we will be discussing on another article. Among them
- Online IDE, login and start coding your project
- Monitoring capabilities over your project and lambda functions
- Remote testing of your lambda functions in a more fashionable way
- Efficient GUIs so you can build, deploy and test your code with just a click
- Code less – Focus more on business logic than operations of resources
- Sigma supports AWS, GCP while Serverless framework supports AWS, GCP, Azure, OpenWhisk, Kubeless, Spotinst, fn, Cloudflare
- Supports only nodejs with Sigma and Serverless framework supports every language which backend services support
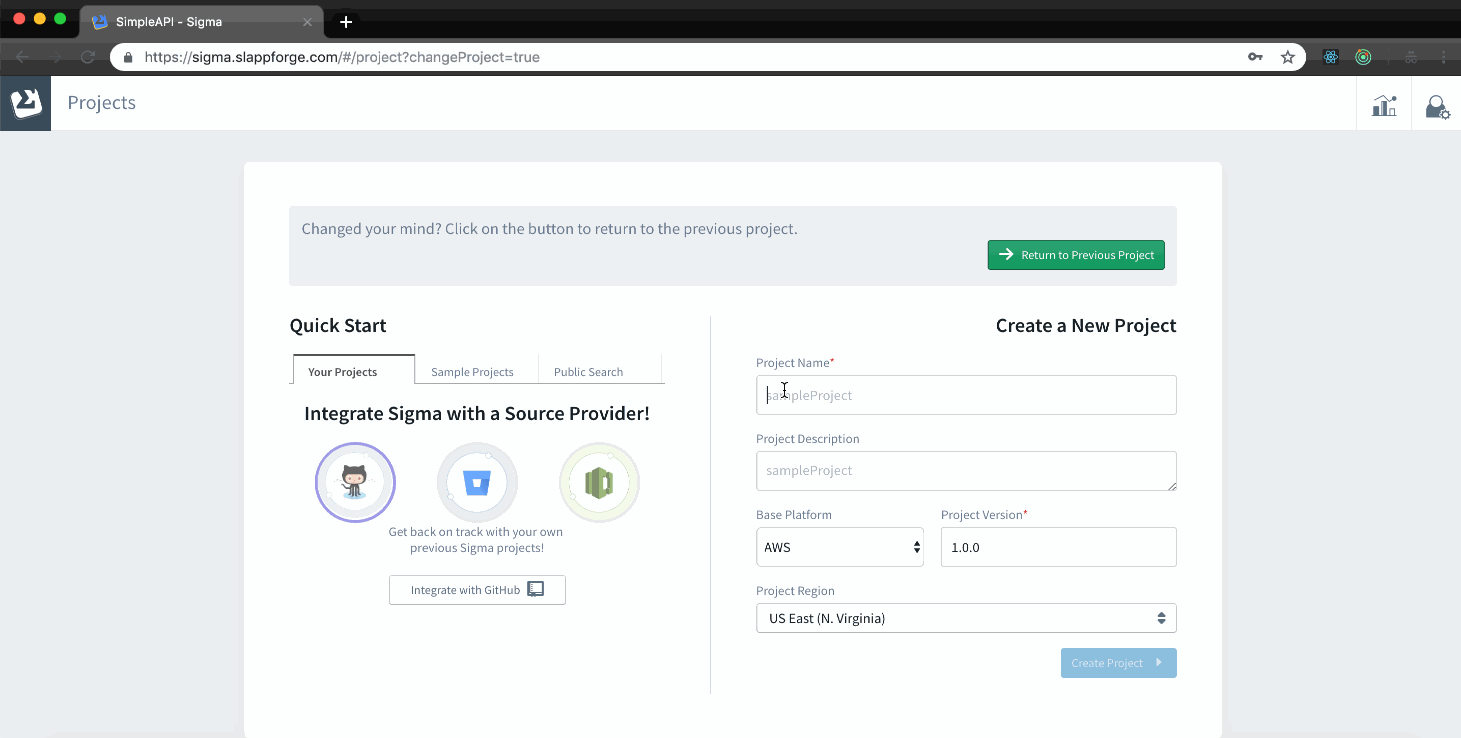
Creating a new project
- The serverless framework supports projects created with other frameworks like ExpressJs while sigma is not
- Both create a template of a project that could be deployable
AWS credentials profiles
- Serverless can keep multiple AWS profiles with AWS credentials and deploy with the selected profile easily, while sigma can only keep one profile of AWS with credentials and user has to update that profile every time when the user wants to deploy it to another AWS environment
VCS
- Version control with serverless can be done according to the users’ wish but in sigma, it is limited to bitbucket and GitHub with the git protocol
Adding resources and writing codes
- Adding triggers or resources to the project could be done easily with Sigma with drag and drop option, while in Serverless framework it needed to be declared in a yml file with all the permissions required for the resource or the trigger
- In Sigma, there are 2 options for writing codes for resources
- Which user can drag and drop resource and autogenerate the code, and autogenerate required permissions for the resource
- Or write the whole code in manually and setup permissions required manually for the used resources as required
- In serverless code should be written in manually and permissions for the resources and required resources should be declared in yml file manually
- GUI in sigma make things really easy, but in serverless, you have to remember every command to do make actions such as deploy, invoke, test, see logs
- In the serverless framework, you can define several lambda functions in a single file, but with Sigma, only one lambda function can be declared in a single file
Monitoring
- Sigma provided monitoring tools to monitor your projects, lambda functions against Invocations, Invocation time, throttles, errors, cost, memory usage, Serverless does not have this kind of facility on monitoring
Testing and Invoking Functions
- Sigma comes with a builtin toolbox with HTTP client, SNS client and SQS client, so no need of 3rd party tools like the postman, Serverless does not have this kind of capability or a tool, So it needs other 3rd party tools
- Testing sigma can be done without deploying functions every time you make changes in the code. There is a similar option with serverless framework also. In serverless framework it is done with invoking the function locally
- Offline testing for APIs and dynamoDB is can be done with the serverless framework using several other dependencies, but in sigma offline testing is impossible
Deployment
- Sigma has two kinds of deployments
- Full deployment
- Quick deploy
- Likewise, Serverless framework has
- Full deployment – deploy when functions, event or resource configurations have been updated
- Function deployment – only overwrite the zip file with AWS function much faster
- Sigma in default display the error if any deployment failed, in serverless, you need to deploy the project in verbose mode to know the full deployment details and error in deployment failures
API Gateway
- In Sigma you can not declare advance settings for API Gateway such as authorizations, headers, API keys for the API gateway from sigma itself, but in Serverless framework you can declare advance options in yml file itself
Layers
- In serverless, you can upload and use those layers, while sigma can use only the uploaded layers
 Never miss a story from us, subscribe to our newsletter